1999 Ford F-250 Speaker Sizes and Audio System Guide
1999 Ford F-250 Speaker Sizes and Audio System Guide
Save this audio guide to your Ownery garage
This page covers the factory speaker locations, original speaker sizes, and practical upgrade notes for the 1999 Ford F-250. Equipment can vary by trim, body style, or audio package, so the exact setup may differ from one truck to another. Factory amplifier details should be verified by trim and audio package, and selected audio systems may also include additional equipment if equipped.
Data verified by Nick Marchenko, PhD
Speaker Size Chart – 1999 Ford F-250
Use this table as the main reference. Fitment depends on trim, factory audio package, mounting depth, and adapter availability.
| Location | Type | Factory Size | Note |
|---|---|---|---|
| Front Door | Full-Range | 6 x 8 inch | |
| Rear Door | Full-Range | 6 x 8 inch | |
| Behind Seat | Full-Range | 6 x 8 inch |
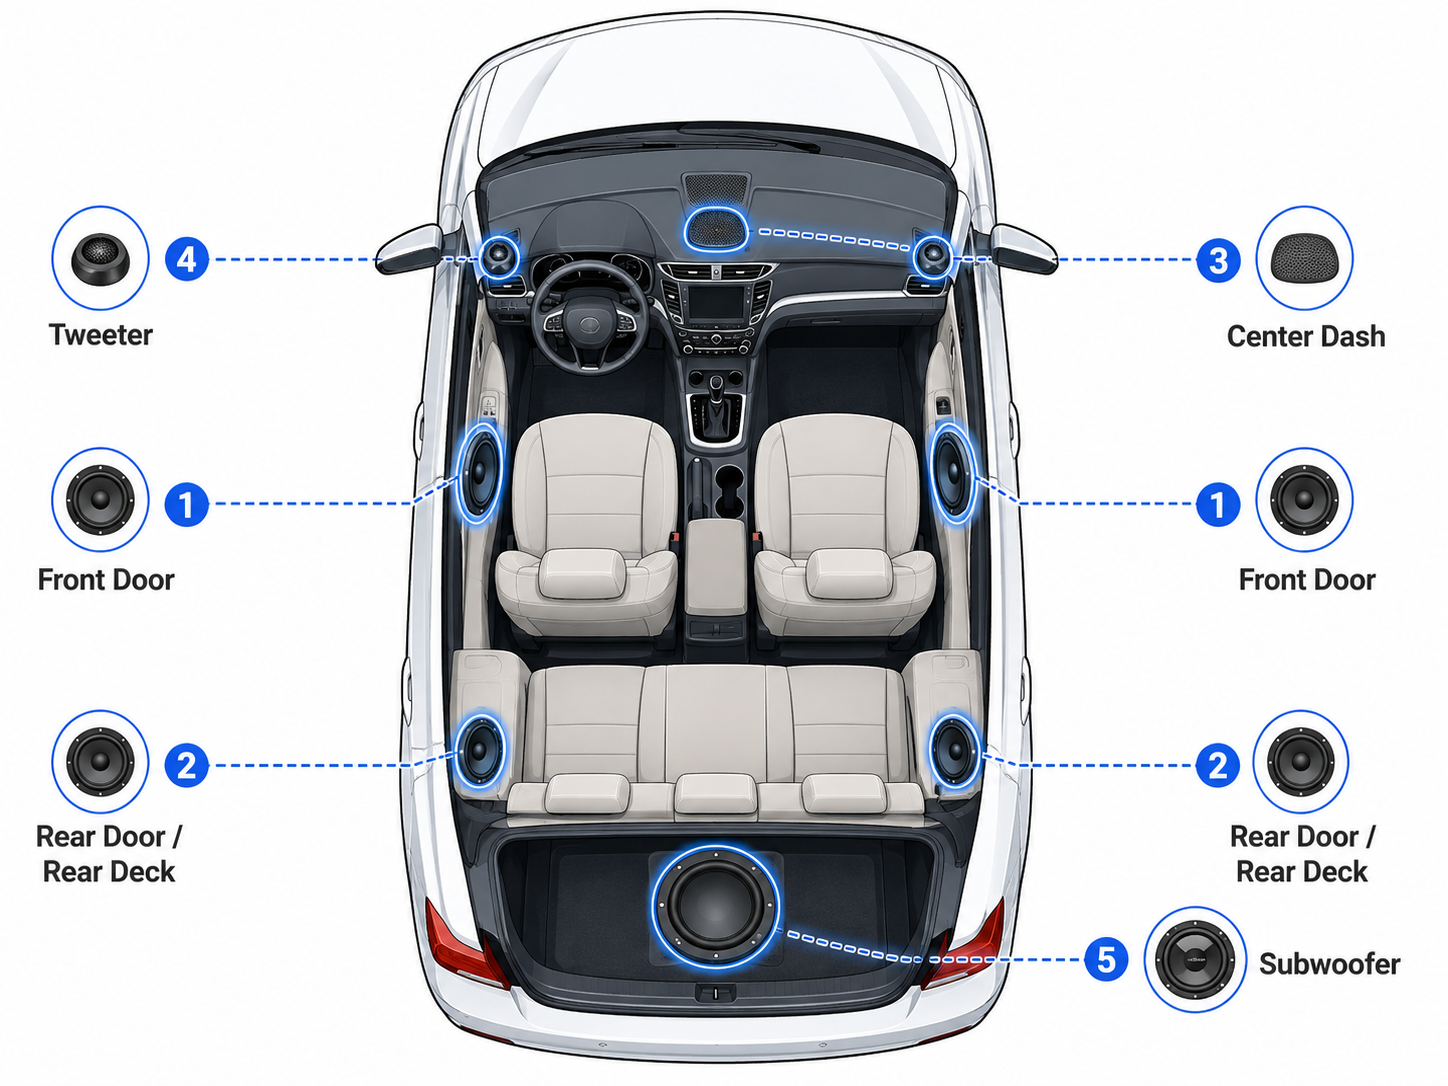
Generic speaker location diagram. The table above shows the specific factory sizes for this vehicle. Exact location details may vary by body style and trim.
Speaker Count by Trim – 1999 Ford F-250
Speaker count and audio equipment vary by trim and factory audio package. This table lists known configurations from our database.
| Trim | Speakers | Amplifier | Radio | Navigation |
|---|---|---|---|---|
| Lariat 4x2 Regular Cab Styleside 138.5 in. WB | 4 | – | – | – |
| Lariat 4x2 SD Crew Cab 156.2 in. WB HD | 4 | opt | – | – |
| Lariat 4x2 SD Crew Cab 8 ft. box 172.4 in. WB HD | 4 | opt | – | – |
| Lariat 4x2 SD Regular Cab 8 ft. box 137 in. WB HD | 4 | opt | – | – |
| Lariat 4x2 SD Super Cab 141.8 in. WB HD | 4 | opt | – | – |
| Lariat 4x2 SD Super Cab 8 ft. box 158 in. WB HD | 4 | opt | – | – |
| Lariat 4x2 SuperCab Styleside 138.5 in. WB | 4 | – | – | – |
| Lariat 4x4 Regular Cab Styleside 138.8 in. WB | 4 | – | – | – |
| Lariat 4x4 SD Crew Cab 156.2 in. WB HD | 4 | opt | – | – |
| Lariat 4x4 SD Crew Cab 8 ft. box 172.4 in. WB HD | 4 | opt | – | – |
| Lariat 4x4 SD Regular Cab 8 ft. box 137 in. WB HD | 4 | opt | – | – |
| Lariat 4x4 SD Super Cab 141.8 in. WB HD | 4 | opt | – | – |
| Lariat 4x4 SD Super Cab 8 ft. box 158 in. WB HD | 4 | opt | – | – |
| Lariat 4x4 SuperCab Styleside 138.8 in. WB | 4 | – | – | – |
| XLT 4x2 Regular Cab Styleside 138.5 in. WB | 4 | – | – | – |
| XLT 4x2 SD Crew Cab 156.2 in. WB HD | 4 | opt | – | – |
| XLT 4x2 SD Crew Cab 8 ft. box 172.4 in. WB HD | 4 | opt | – | – |
| XLT 4x2 SD Regular Cab 8 ft. box 137 in. WB HD | 4 | opt | – | – |
| XLT 4x2 SD Super Cab 141.8 in. WB HD | 4 | opt | – | – |
| XLT 4x2 SD Super Cab 8 ft. box 158 in. WB HD | 4 | opt | – | – |
| XLT 4x2 SuperCab Styleside 138.5 in. WB | 4 | – | – | – |
| XLT 4x4 Regular Cab Styleside 138.8 in. WB | 4 | – | – | – |
| XLT 4x4 SD Crew Cab 156.2 in. WB HD | 4 | opt | – | – |
| XLT 4x4 SD Crew Cab 8 ft. box 172.4 in. WB HD | 4 | opt | – | – |
| XLT 4x4 SD Regular Cab 8 ft. box 137 in. WB HD | 4 | opt | – | – |
| XLT 4x4 SD Super Cab 141.8 in. WB HD | 4 | opt | – | – |
| XLT 4x4 SD Super Cab 8 ft. box 158 in. WB HD | 4 | opt | – | – |
| XLT 4x4 SuperCab Styleside 138.8 in. WB | 4 | – | – | – |
| Work Series 4x2 Regular Cab Styleside 138.5 in. WB | 2 | – | – | – |
| Work Series 4x2 SuperCab Styleside 138.5 in. WB | 2 | – | – | – |
| Work Series 4x4 Regular Cab Styleside 138.8 in. WB | 2 | – | – | – |
| Work Series 4x4 SuperCab Styleside 138.8 in. WB | 2 | – | – | – |
| XL 4x2 Regular Cab Styleside 138.5 in. WB | 2 | – | – | – |
| XL 4x2 SD Crew Cab 156.2 in. WB HD | 2 | opt | – | – |
| XL 4x2 SD Crew Cab 8 ft. box 172.4 in. WB HD | 2 | opt | – | – |
| XL 4x2 SD Regular Cab 8 ft. box 137 in. WB HD | 2 | opt | – | – |
| XL 4x2 SD Super Cab 141.8 in. WB HD | 2 | opt | – | – |
| XL 4x2 SD Super Cab 8 ft. box 158 in. WB HD | 2 | opt | – | – |
| XL 4x2 SuperCab Styleside 138.5 in. WB | 2 | – | – | – |
| XL 4x4 Regular Cab Styleside 138.8 in. WB | 2 | – | – | – |
| XL 4x4 SD Crew Cab 156.2 in. WB HD | 2 | opt | – | – |
| XL 4x4 SD Crew Cab 8 ft. box 172.4 in. WB HD | 2 | opt | – | – |
| XL 4x4 SD Regular Cab 8 ft. box 137 in. WB HD | 2 | opt | – | – |
| XL 4x4 SD Super Cab 141.8 in. WB HD | 2 | opt | – | – |
| XL 4x4 SD Super Cab 8 ft. box 158 in. WB HD | 2 | opt | – | – |
| XL 4x4 SuperCab Styleside 138.8 in. WB | 2 | – | – | – |
Data sourced from manufacturer specifications. Verify with the window sticker or dealer before ordering audio components.
Vehicle and Audio System Specifications
This block helps identify the vehicle and its audio system configuration for fitment decisions.
What Speakers Fit the 1999 Ford F-250?
Aftermarket fitment should start with the factory speaker locations listed above, but diameter alone is not enough. Check mounting depth, bracket fit, connector type, and whether the vehicle has a factory-amplified audio system. This 1999 Ford F-250 uses 6 x 8 inch full-range speakers in the listed locations, and speaker count can vary by trim. Factory amplifier details should be verified by trim and audio package before ordering.
Usually Safe Upgrades
- If your vehicle uses the front door 6 x 8 inch location, many aftermarket 6 x 8 inch full-range speakers are the first place to start.
- If your vehicle uses the rear door 6 x 8 inch location, choose a replacement that matches the factory opening and mounting depth.
- If your vehicle uses the behind-seat 6 x 8 inch location, look for speakers that fit the same size and allow enough clearance behind the panel.
- If equipped with a factory amplifier, confirm speaker impedance and wiring needs before buying replacements.
Check Before Buying
- Verify the exact speaker location on your truck, since speaker count can vary from 2 to 4 by trim.
- Measure mounting depth and check for any factory bracket or adapter requirements before choosing a speaker.
- Confirm connector style and wiring compatibility so the new speakers can be installed cleanly.
- If equipped with premium audio, make sure the replacement speakers work with that system layout.
Installation Notes
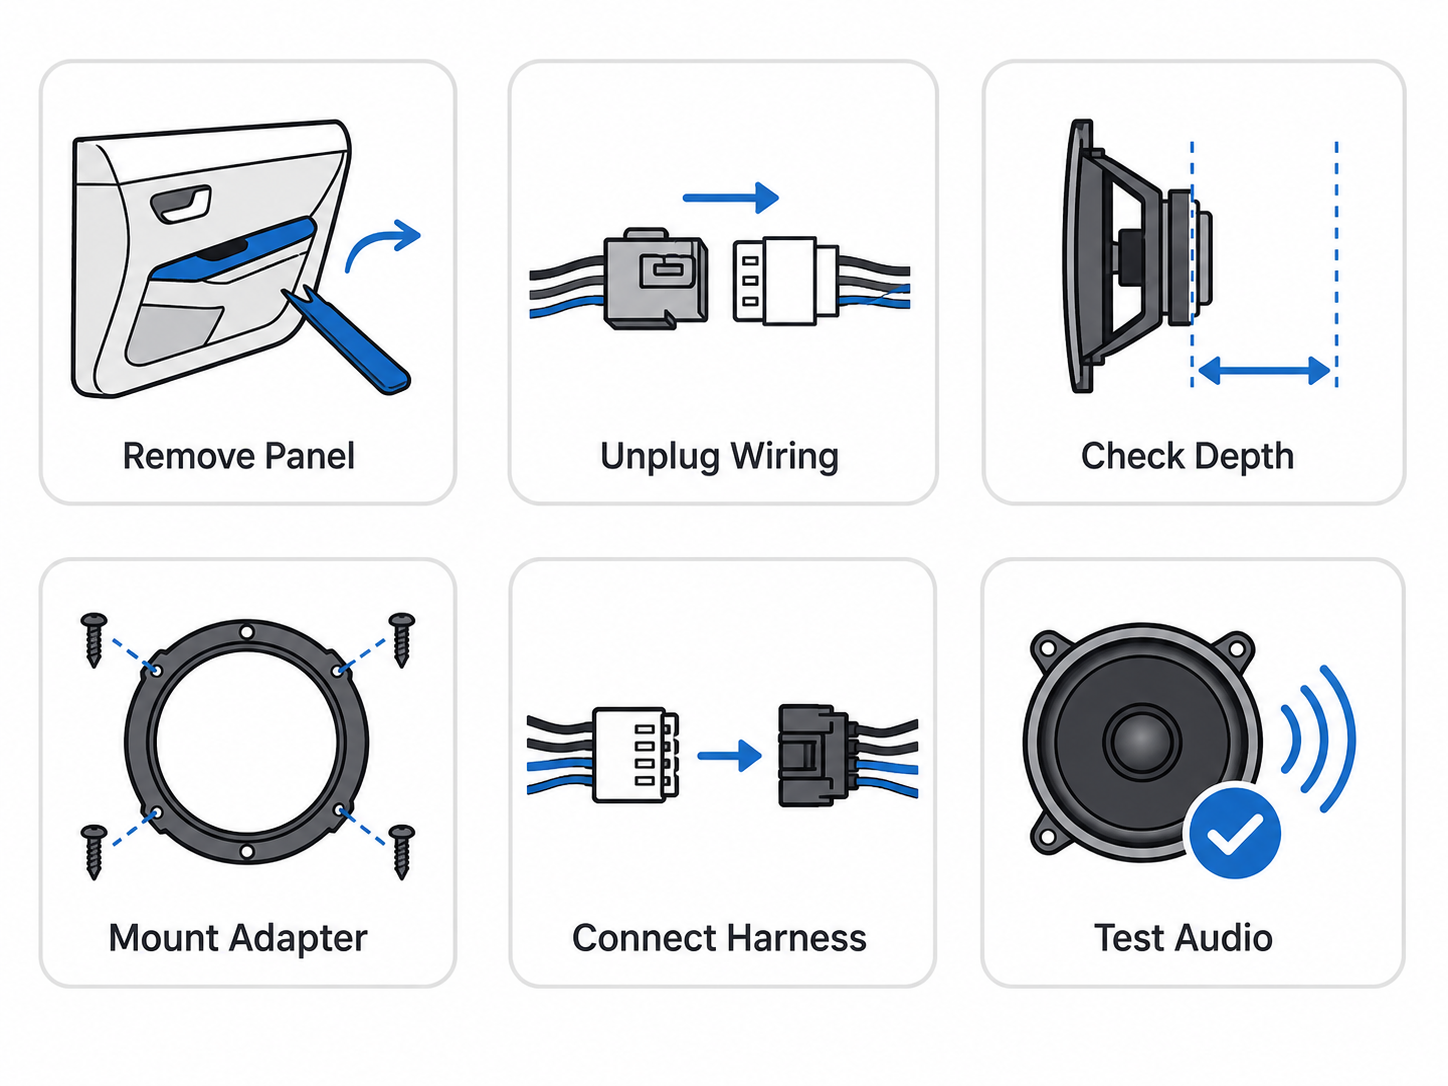
The 1999 Ford F-250 uses 6 x 8 inch full-range speakers in the front door, rear door, and behind the seat locations, so installation usually starts with careful panel removal and a close look at the factory wiring before anything is disconnected. Speaker count can vary by trim, and factory amplifier details should be verified by trim and audio package. Some trims may also need an amplifier-aware wiring approach, so confirm the system before ordering parts. Because speaker depth can vary behind the factory openings, check clearance before final mounting. Mounting adapters may be needed to secure aftermarket speakers in the factory locations, and harness adapters can help keep the wiring clean and reversible. If your vehicle has the factory subwoofer, match the replacement plan to that system before installing anything. After everything is connected, test each speaker location for balance, polarity, and clear output before reinstalling the panels.
Moderate difficulty, since trim differences, panel removal, and wiring verification can affect the job.
Common Mistakes When Replacing Speakers
The biggest mistakes with a 1999 Ford F-250 audio upgrade usually happen when buyers assume every truck uses the same speaker setup or skip basic fitment checks.
- Buying based only on the body-style label instead of checking actual speaker locations on the vehicle. This truck uses 6 x 8 inch full-range speakers in the front door, rear door, and behind the seat on the data provided, but speaker count still varies by trim and audio package.
- Ignoring trim and audio package differences before ordering parts. The trim table shows 2-speaker and 4-speaker configurations, and factory amplifier details should be verified by trim and audio package because amplifier availability is not universal.
- Choosing speakers without checking mounting depth and connector style first. Even when the size is listed as 6 x 8 inch, the new speakers still need to match the available space and the vehicle’s wiring connection.
- Assuming tweeters or a factory subwoofer are part of every setup. Tweeters are not listed for this model year, and a factory subwoofer is not listed, so selected audio systems may vary and should be confirmed before buying.
- Skipping a test fit and sound check before putting the panels back together. Always verify speaker operation, polarity, and clearance first so you do not have to reopen the doors or rear panels later.
Generation & Model Family
The 1999 Ford F-250 belongs to the First generation (PHN131) (1999–2004) family. Nearby model years often share similar speaker locations and audio layouts, but exact fitment can vary by trim and audio package – verify before ordering.
Recommended Upgrade Path
This 1999 Ford F-250 uses 6 x 8 inch full-range speakers in the main locations, and speaker count can vary by trim. Some trims may also include a factory amplifier, so audio package details should be verified before choosing upgrades. A smart upgrade path starts with the front stage, then adds bass or power based on your goals and equipment level.
| Goal | Best Upgrade Path | Why |
|---|---|---|
| Better clarity | Upgrade the front door speakers first, then add tweeters if equipped or choose speakers that improve midrange and high-frequency detail. If your trim has a factory amplifier, verify integration before changing the front stage. | The front speakers do most of the work for vocals and detail, so improving them usually gives the biggest clarity gain. Tweeters are not listed for this truck, so the best approach is to focus on cleaner front-stage sound and confirm factory amp details by trim and audio package. |
| More bass | Keep the factory speakers in place if needed and add an aftermarket subwoofer system to fill in low-end output. If your truck has a factory amplifier or premium audio package, verify how it is wired before adding bass equipment. | No factory subwoofer is listed, so adding a subwoofer is the most effective way to increase bass. This lets the main speakers handle mids and highs while the sub covers the low end. |
| Louder sound | Use properly matched speakers and amplifier integration to improve volume and reduce distortion. Before adding aftermarket amplifiers, verify factory amp and premium system details by trim and audio package. | Higher output only helps when the system is matched correctly. This truck may have factory amplifier equipment on some trims, so integration should be checked first to avoid poor results or uneven sound. |
| Budget improvement | Replace the front door speakers first with same-size replacement speakers and the correct mounting brackets. If you want a low-cost next step, move to the rear door or behind-seat speakers after the front stage is done. | Front speakers usually deliver the most noticeable improvement for the money. Starting there gives a clear upgrade without needing a full system rebuild. |
| Factory look | Use same-size replacement speakers with the correct mounting brackets and harness adapters for a clean install that preserves the factory wiring and appearance. | This approach keeps the cabin looking original while still improving sound. It also helps avoid cutting factory wiring and makes the upgrade easier to reverse later. |
Mounting Adapters and Wiring
The same nominal diameter does not guarantee a direct mount. Before ordering, confirm:
- Speaker depth: Aftermarket speakers often have larger magnets – measure available depth at each location.
- Mounting brackets: Door locations typically need a bracket or spacer to clear the window regulator and achieve correct mounting depth.
- Wiring harness adapters: Use a plug-and-play harness adapter to preserve factory wiring.
- Tweeter mounting cups: Replacing OEM tweeters may require surface-mount cups or brackets depending on the location.
- Factory or premium amplified systems: If the vehicle has a premium or factory-amplified audio system, confirm how the factory radio, amplifier, and speakers are connected before adding aftermarket amplifiers. Depending on the setup, a line output converter, DSP, integration harness, or professional installation may be needed.
- Connector type: Factory connectors vary by trim and model year – confirm compatibility before splicing or using an adapter.
Frequently Asked Questions
What size are the front door speakers in a 1999 Ford F-250?
The front door speakers are 6 x 8 inch full-range units. This size is listed for the 1999 F-250 and applies to the model data provided here.
What size are the rear speakers in a 1999 Ford F-250?
The rear door speakers are 6 x 8 inch full-range units. Speaker equipment can vary by trim, but this size is listed in the model data for the rear location.
Does the 1999 Ford F-250 have a factory subwoofer?
A factory subwoofer is not listed for this model year. If equipped on a specific audio package, it would depend on the vehicle’s trim and factory audio setup.
Can I replace the speakers without replacing the radio?
Yes, speaker replacement can be done without changing the radio. The factory radio setup varies by trim, so matching the new speakers to the vehicle’s speaker locations is the key step.
Do I need mounting adapters for speaker replacement?
Mounting adapters may be needed depending on the speaker and installation method. The factory speaker locations are 6 x 8 inch, so adapter needs should be checked against the replacement speakers.
Does the 1999 Ford F-250 have a factory amplifier?
Factory amplifier details should be verified by trim and audio package. Some trims list an amplifier option, while others do not, so the audio system can vary across the model range.